Tag Archives: YouTube

How to Unblock U.S. Only Videos (YouTube, Hulu, Max, etc.)

Being denied access to a video due to living outside the U.S. may be one the most annoying problems to plague the web.

Popular streaming apps like Hulu, Max, Netflix, and ESPN Sports all offer brilliant content that’s only available to Americans due to distribution rights and copyright restrictions.

Luckily, there are a variety of browser plugins, software, and services you can use to overcome this barrier.

These days, virtual private networks (VPNs) are the standard when it comes to removing geo-restrictions placed on video content. Proxies and plugins that unblock content on YouTube are free alternatives. However, they aren’t always quick enough to stream high-quality video without hiccups.

VPNs ensure flawless video playback and are affordable though. A VPN service may be worth it if you crave plenty of U.S.-only content.

Why are Some Shows Only Available in the US?

To many fans of high-quality TV shows it’s puzzling why some of the best shows can only be enjoyed in the US. For example, Netflix subscribers in Canada looking to revisit their favorites may be surprised to learn ‘Friends,’ ‘The Office US,’ and ‘It’s Always Sunny in Philadelphia’ aren’t in their library.

Streaming services display content according to your location. The country that your IP address is associated with determines which content is shown and which content is excluded. Thus, Netflix US and Netflix Canada have different libraries with plenty of overlap but also in-demand exclusives.

Some TV executives make strict licensing agreements with streaming platforms so they can control where a given TV show can be screened. Apps also have exclusives that are intended to gain subscribers by offering content that isn’t available anywhere else. In other cases, shows aren’t available simply because no company is selling the show in that region.

Plugins

If you plan to watch the occasional U.S.-only video on YouTube and aren’t picky about performance, start with a browser plugin. This will allow you to watch YouTube videos that are normally restricted in your country

There are two popular Chrome plugins to consider: Youtube Unblocked and Unblocker for YouTube. These plugins work by hiding your true IP and replacing it with an IP associated with the country the video is allowed in.

This approach is hit or miss since the developers of the plugin need to keep it up to date for it to continue working. Additionally, you could be required to enter captcha codes on YouTube to prove you’re human, which gets tiresome. This happens because the proxy server IPs tend to be overused.

VPNs

If you’re planning on watching a fair bit of video on YouTube or Hulu and want the best user experience, free of technical hiccups and slow download speeds, VPNs are the way to go.

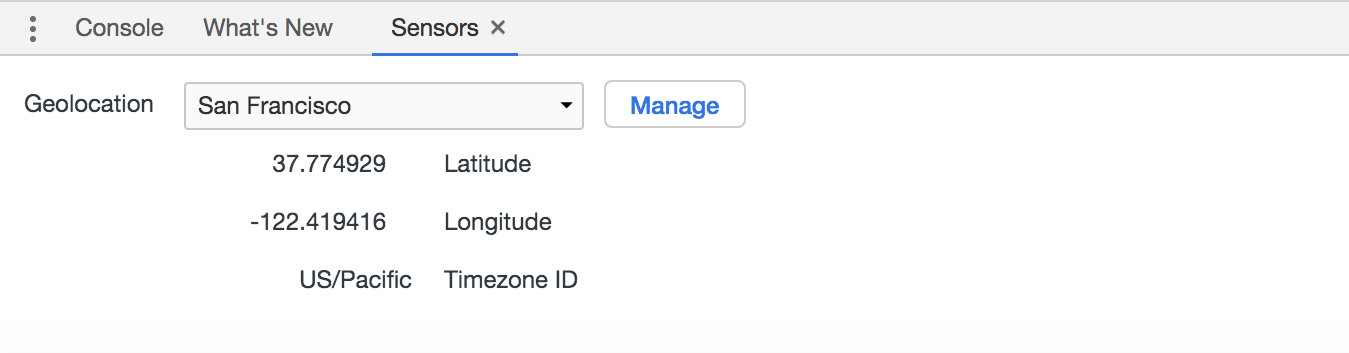
VPNs add a secure layer between your device and the internet so you have enhanced online privacy. Your real IP address is replaced with an IP associated with any country of your choosing.

With a VPN you download desktop software or an app, which manages connecting to available servers. It allows you to select a country that has access to the videos you want to watch. Thus, restrictions are removed.

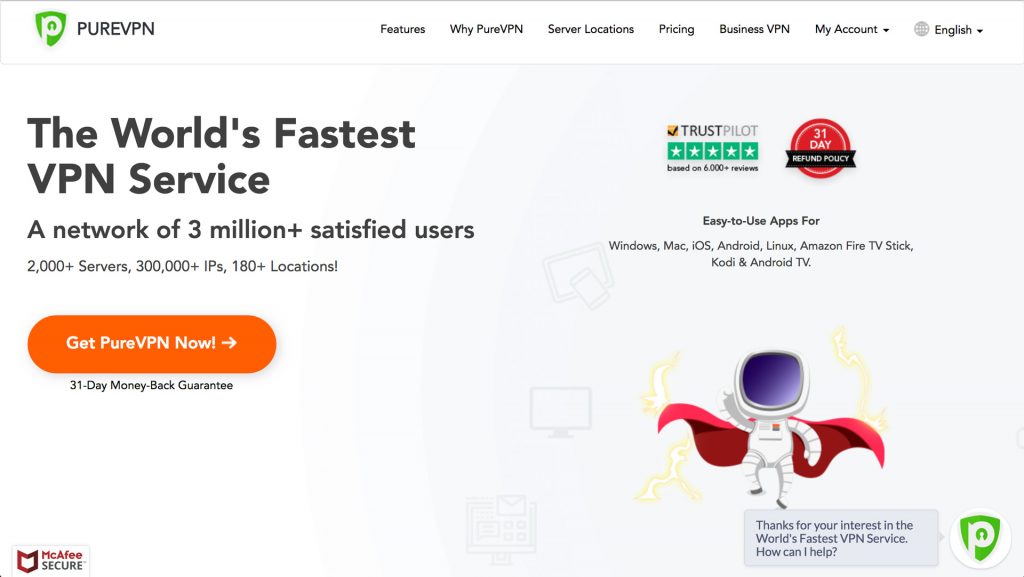
I recommend these VPN services for unrestricted video streaming:

High download speeds are necessary for HD video streaming so it’s vital to choose a VPN that doesn’t hinder performance when it’s enabled.

Closing Remarks

Hopefully, content providers will get laxer about restricting videos from being viewed outside the U.S. as time moves ahead. Some of these copyright laws strike many as antiquated and arbitrary.

Until then, enjoy all the videos you can handle with a handy plugin for YouTube or a VPN.

Clever Hacks to Get YouTube TV in Canada

YouTube TV launched in the U.S. in 2017. There’s been speculation that they would expand outside of the U.S. and offer their streaming service to Canadians along with others like Hulu. However, YouTube TV hasn’t made an official announcement about this.

So, Canadians that are tired of hoping and waiting may want to grab the bull by the horns. Yes, you can get access to YouTube TV in Canada today! All you need to do is jump through some hoops before signing up and follow the tech savvy steps in this guide.

Is It Worth the Effort?

Netflix, Amazon Prime Video and CBS All Access are available in Canada. Thus, one might wonder if getting YouTube TV in Canada is really worth it.

For those who want a comprehensive replacement for cable TV, it is. This a great opportunity to get sports, news, and special interest programming you don’t have access to on Netflix.

Channels on YouTube TV

Google has obtained deals with the five major TV networks in the U.S.: ABC, CBS, Fox, NBC, and The CW. About 40 cable channels owned by the parent companies of those networks are all onboard. This includes content from The Walt Disney Company, CBS Corporation, NBCUniversal, Brave, USA Network, Discovery, CNN, Cartoon Network, Fox Sports 1, BBC, ESPN and more.

Like traditional cable TV, it’s also possible to add additional premium channels. Some of these channels include AMC Premiere, Showtime, and NBA League Pass.

How to Gain Access to YouTube TV in Canada

YouTube TV has a variety of methods to verify if the user is based in the U.S. Therefore, to pass these checks and successfully get a YouTube TV account, you need to ensure their site can’t tell you’re based in Canada.

1. VPN Location Magic

First, you’ll need a VPN. By using a VPN, you can access the web with an IP address associated with a physical location in the U.S.

To do that, sign up with a VPN provider, and choose a plan. These services are very inexpensive these days. And typically, if you’re willing to commit to a plan for a year or more, you can save quite a bit.

Recommended VPNs are listed below. For more details, read full reviews of the top 3 VPN services here.

2. Get a U.S. PayPal Account

If you use a Canadian credit card, you’re rolling the dice. You may be able to rig YouTube TV’s payment system to accept it, but that doesn’t work with every credit card provider.

The most reliable method is to set up a U.S. PayPal account.

To ensure success, be sure to follow these tips:

  1. Before you do anything, enable your VPN. And make sure the service has assigned you with a U.S. IP address. This will give you access to the U.S. version of PayPal.
  2. Use a valid email that isn’t already associated with a PayPal account.
  3. When signing up, put in your real street address and credit card info, as you normally would.
  4. You’ll need to choose a zip code and find the U.S. city that is associated with it. The full process is below.

Your Canadian postal code needs to converted to a zip code. To do this, remove all the letters from it. For example, a postal code of M4B 1G7 is changed to 417. Next, to make it valid, add zeros to the end so it’s five digits. So, your new zip code should look something like this: 41700.

Keep in mind the zip code you got from the above process must be real for it to work. To verify if it’s valid, go to the USPS website and enter it. If it’s invalid, replace one of the zeros with a one. That should do the trick.

Finally, enter the U.S. city from the address found in the USPS link, along with your real street address. Now you should be able to complete the PayPal sign-up process.

3. Create a U.S. Gmail Account

This part is really simple!

  • Go to Gmail.com and click on the option to get a new account.
  • Make sure that you select the United States as your location.
  • Validate your account with your mobile phone number.

4. Change Your Location in Chrome

Although you’re now using a VPN to hide your location, Chrome can still spill the beans and reveal that you’re actually based on Canada.

The final step in hiding your whereabouts is editing the settings in Chrome’s location services.

Important: you’ll need to repeat these steps every time you launch your browser

  • Launch Google Chrome
  • Press ‘Ctrl,’ ‘Shift,’ ‘I’ to open Chrome’s backend framework on a PC. Mac users will want to hit ‘Command,’ ‘Option’ and ‘I.”
  • Click the icon made up of three little dots in the top corner of the new panel that just launched. Go to ‘More Tools,’ and then select ‘Sensors.’
  • You’ll now see an option called ‘Geolocation’ with a dropdown menu next to it. Select a location in the U.S. such as ‘San Francisco’ or ‘Mountain View.’
  • Great, now Chrome will think that you’re in the U.S.

5. Access Your YouTube TV Account

Whew, you’re nearly there. All you need to do is test that everything worked.

  • Go to the YouTube TV website.
  • Sign in with your U.S. Gmail account.
  • Choose to pay for the service with PayPal, then sign in the PayPal account you just created.
  • If all is good you should see a $1 charge and refund in your PayPal account (this is part of the validation process).

You Did It!

Congrats! You now have YouTube TV, just like the fortunate folks in the States.

As the process is pretty involved this guide is intended for PC and Mac users.

If you’re even more ambitious and tech savvy you can also get YouTube TV to work on Google Cast, Android, iOS, and Apple TV. To learn more about support for these platforms check out the guide on MobileSyrup (and scroll to the bottom of the article).